First Use
Load video
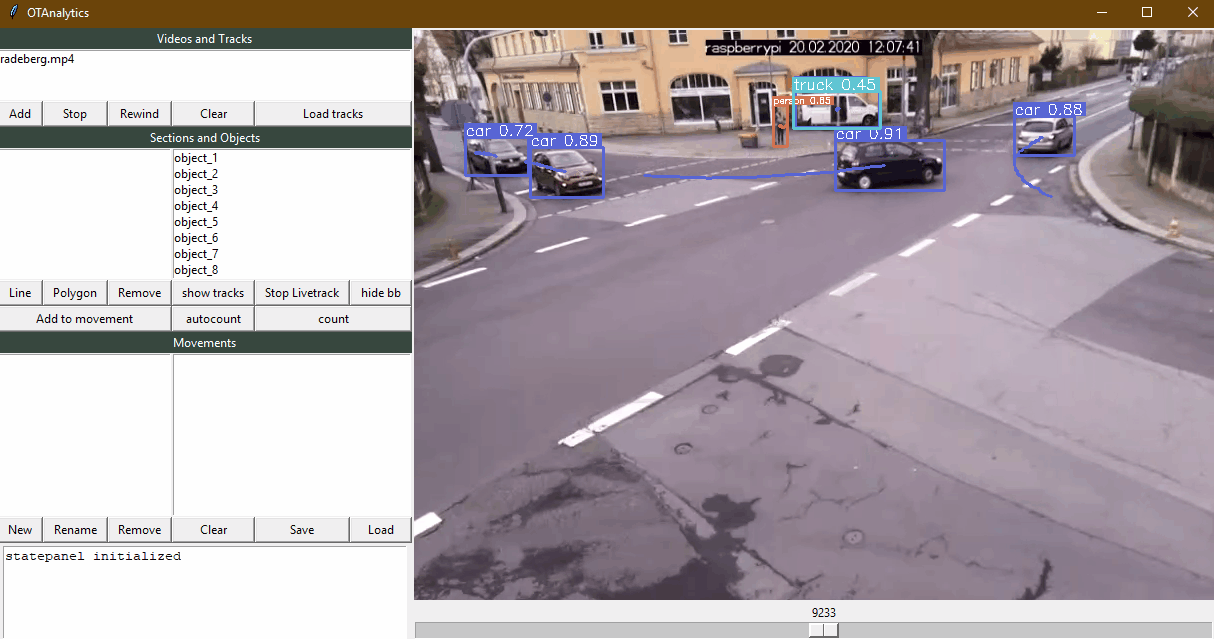
OTAnalytics provides a simple graphical user interface. Your first step should be to load a video file in the most common formats (e.g. mp4) by clicking on the "load video"-button. The chosen filename will be inserted in the upper left listbox and a canvas with the first videoframe will be created. You can navigate through the video by either mouse wheel scrolling, sliding or simply playing the video.
Load and select trajectories
A click on the "Load tracks"-button opens a dialogue window which asks for a
tracks file from OTVision.
Here you have to select a file with .ottrk extension,
which corresponds to the video you loaded earlier.
This file contains framewise information about road users such as class, position,
and size.
After loading the tracks, the road users ID´s and classes will be displayed in a listbox. The user interface also provides multiple options to display the tracks on the canvas:
- a single track or multiple tracks by selecting the road users IDs or you can display all tracks at once.
- bounding boxes and tracks of the cars currently visible on the canvas.
Check Trajectories
After importing all necessary files, it is important to check if chosen data correspond to eachother. The easiest way to do this, is to play, slide or scroll through the video. The bounding boxes should overlay vehicles, pedestrians, and cyclists.
Early prototype
The currently available version of OTAnalytics described in this documentation is in early prototype stage. This version works and offers an impression of the functionality.
It is partially tested on Windows 10.
We are currently working on a complete re-implementation for a stable release. It will also be tested on Mac and Linux.
Stay tuned :)